Category Archives: DIY

How Easy is it to Replace Kitchen Doors?

Replacing your old kitchen doors with new doors may seem like an easy way to update your kitchen, but is it really that easy?

The Devil’s in the Detail

In truth replacing the doors on your kitchen units is a relatively straight-forward process. There are plenty of places to buy replacement kitchen doors and accessories, and masses of door styles to choose from. One of the tricks to knowing how difficult a project is going to be is around the edges of the kitchen. This is where the finish of the kitchen will show, and the quality of the workmanship can make the difference between a brand new looking kitchen, and a hatchet job.

End Panels

End panels are used to cover up any exposed kitchen cabinets (also called kitchen carcasses by some). Using an end panel mean that you can have a different kitchen cabinet from the doors, and gives you much more freedom when choosing your new kitchen door.

You need to ensure that you can accommodate this end panel in your kitchen, especially if you are not already using it. The panel is normally between 18mm and 22mm thick and is fitted to the end of the cabinet.

Plinths or Kickboards

Plinth, also known as kickboards, are the piece of material (normally wood, sometimes aluminium), that runs along the bottom of the kitchen. It is usually slightly set back, and is attached to the legs of the base units, to hold it in place. When buying the replacement kitchen doors, you should buy the plinth to match. This is usually about 3 metres long. You use one or more pieces to produce one long run, without gaps. This gives ties your kitchen together (aesthetically).

The Kitchen Doors

When replacing the doors, there is a key thing to understand. Kitchen doors are always slightly smaller than the kitchen units. This is so that they can open without catching against each other.

Each manufacturer has slightly different measurements, but the width are normally 3-4mm narrower than a units, so for a 600mm wide base unit, the door will normally be 596mm or 597mm wide. Don’t worry too much about one or two millimetres difference from your current doors to the new ones, you won’t be able to tell once they are fitted.

The doors are normally 5mm shorter than the units themselves, so for a base unit, the unit is normally 720mm high, the doors are normally 715mm high. Once again, don’t worry too much if they are slightly shorter than that.

Hinges

Kitchen Hinges

There are three things to consider with the hinges.

The position of the hinge

You will need to measure the position of the hinge in relation to the top and the bottom of the door. This is measured in millimetres. This is sometimes called the drill hole, when ordering the new doors.

The hinge side

The only matters if the door has a pattern on it, or if it has a handle integrated into it, or if the hinge holes are not drilled at the same position top and bottom. If this is the case you will need to decide whether you want it drilled left or right. This is as you look at the door when it is closed, fitted on to the cabinet.
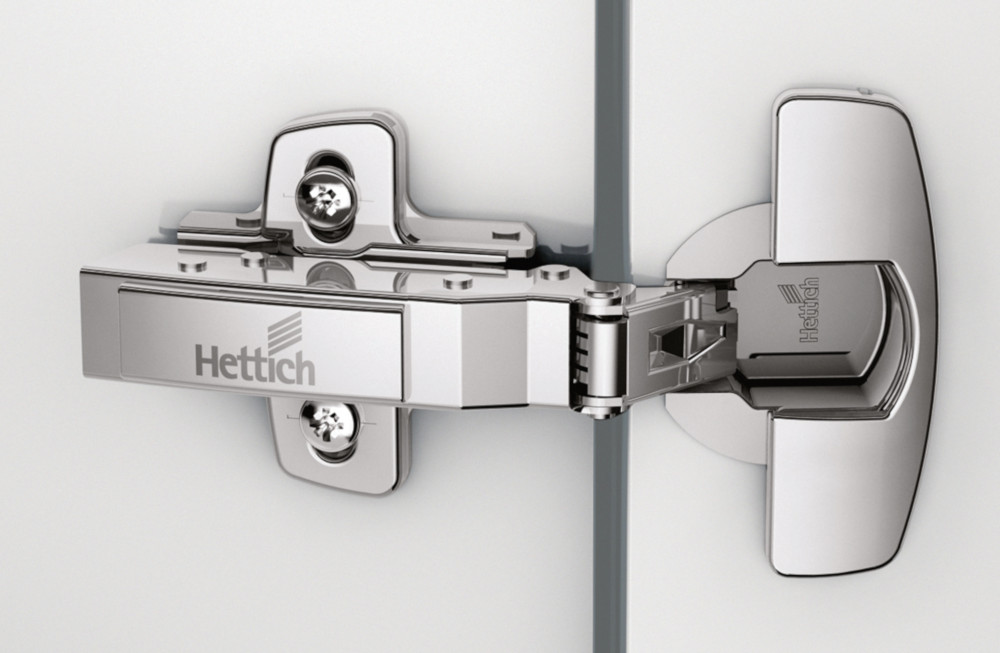
Type of hinge

We would recommend only going for integrated soft close hinges. These are the hinges that make your door shut slowly. Not only do they avoid loud bangs in your kitchen, but they protect your kitchen doors and cabinets.

Most hinges are 110 degree hinges. These cater for most scenarios, but you do also have specific hinges for top boxes, integrated appliances (like integrated fridges and freezers) and bi-fold hinges, if you are joining doors together, so just take care to replace like-for-like if you are going to replace the hinges.

Conclusion

Replacing your kitchen doors to upgrade your kitchen can be a fantastic way to breathe new life into your kitchen, but make sure you take care of the finer details around the edges to make sure you give the kitchen makeover the finish it deserves.

How to… make a raised garden bed

veg-box

The school holidays are underway, so what better time to get your little helpers involved in a spot of outdoor DIY? Making a raised garden bed or vegetable box is a fun summertime activity to do with your children, and hereÔÇÖs how!

What you need:

Four lengths of board, with each ÔÇÿpairÔÇÖ the same length

Four wooden posts of equal length

1ÔÇØ screws or decking screws

Drill

Heavy duty staple gun or handful of nails

Soil

Weed control membrane

Seeds or plants!


The benefits of a raised garden bed:

A raised bed or veg box can enjoy greater exposure to the sun and improved drainage. You can choose the quality of the soil you put in and youÔÇÖll have less weeds to deal with. Depending on the height of your bed, it can also be easier for children and older relatives to plant and water, plus itÔÇÖs educational, as young children can find out where food comes from as their seedlings grow!


Five steps to a raised bed:


  1. Mark out the position of the raised bed in the chosen location, digging four shallow ÔÇÿtrenchesÔÇÖ for the sides and digging holes at each corner for the posts
  2. Set the posts securely in each corner. If the bed is particularly long, you can strengthen it by adding posts in the centre of the long sides as well
  3. Cut the boards to the required length and place against the corner posts. Drill the boards into place with the screws
  4. Place a layer of weed membrane inside the box, overlapping with the edges all round, and nail or staple
  5. Add the soil and get planting! You can use the beds all year round to grow different vegetables and fruit depending on the season, and donÔÇÖt forget that rotating your crop is also good for the soil!

Once the hard work is finished, all thatÔÇÖs left to do is sit back on the newly-painted garden bench, switch on the outdoor lights and make the most of lazy summer evenings!

garden-lighting

Summertime and the painting is easy

summer-painting

What a difference a spray makes – a good paint spray, that is! Or how about a nice old-fashioned brush? Whatever the method, itÔÇÖs time to scrub up for summer. The sun has well and truly got his hat on this week, meaning itÔÇÖs time to give your garden a makeover for the months ahead.

Jetting off for summer

The key to any paint job is in the prep, and chances are your garden decking and fencing will need a good blast with a jet wash to get rid of moss, lichen and general dirt before you make a start. Alternatively, use a hard-bristled brush to sweep away the cobwebs, particularly in hard-to-reach corners. A thorough clean will help the paint bond with the surface, look better and last longer!

outdoor-lighting

Let us spray

Paint-spraying exterior walls, fences, sheds and decking could, until recently, be quite a haphazard affair! But thankfully there have been large strides in the technology behind spray guns, giving greater control, an even finish and, thankfully, less mess.

There are plenty of choices on the market when it comes to wood treatment, including many different finishes from light oak to deep mahogany. And colourful outdoor paint continues to be popular for sheds and fence panels in 2016 so, if you canÔÇÖt quite afford that Jurassic Coast beach hut, you can always recreate the look by painting the shed sea green and sky blue!

hot-tub

Set in stone

Painting exterior walls not only freshens them up but protects against the weather, too. Remember to put safety first if painting high areas; never overstretch and make sure the ladder is securely positioned, with at least three rungs overlapping if itÔÇÖs an extension ladder.

Cover drainpipes and window sills with newspapers, securing in place with masking tape, and start at the top, working your way downwards. If the walls are heavily textured, use a stippling technique to get into all the nooks and crannies and paint in the opposite direction to ensure even cover.

Set the benchmark

Image: Design-3000

So youÔÇÖve spruced up the walls and fencing, but what about the outdoor extras? Are boring benches, tired tables and scruffy seats letting your al fresco areas down? Check out our previous post on restoring garden furniture to ensure your summer is picnic perfect, and donÔÇÖt forget to freshen up your front door before welcoming the guests around!