
 AutumnÔÇÖs here again, signalling a switch from outdoor maintenance and gardening to indoor decorating. But before you tackle DIY jobs big or small, read our guide to the decorating mistakes you really should avoid if you want your home to stand out for all the right reasons!
DONÔÇÖT start to decorate without proper planning. Think you can do without those fiddly tester pots? Paint can look a lot different on the walls than on a paint chart, so it really is worth investing in a few tester pots before splashing out on litres and litres of the wrong colour. Leave the sample on the wall for at least 24 hours before making a decision, too, because a colour can vary depending on the light.
DO make sure you prep the room first. Sanding down skirting boards before varnishing and masking off switches and sockets can be pretty boringÔǪ but taking the time to prepare properly will make a big difference to the overall finish.┬á
DONT buy all your furnishings from one retailer unless you actually want your lounge to exactly replicate the home department of your favourite store, that is! Mix quality pieces with inexpensive accessories and look for quirky one-offs in antique shops or online that no one else will have.
DONÔÇÖT blindly follow trends if they donÔÇÖt suit your style. A home without your own personal stamp will just look bland, so make sure your d├®cor reflects your personality or that you at least include a few individual items in each room. And remember that fashions donÔÇÖt last anyway, so being utterly on-trend is a bad idea unless you can afford to redecorate every year!
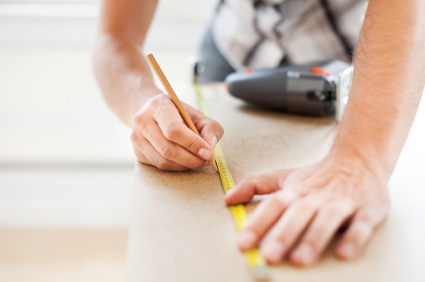
DO measure up before you start; dont just guess. This goes for the number of rolls of wallpaper needed and the length and width of curtains and blinds. Always measure the allocated space for an item of furniture and take the measurements with you when shopping not forgetting to consider extra factors such as whether large pieces will fit through the door or up the stairs!
DO invest in the right tools. A spirit level is a must if youÔÇÖre putting up shelves or towel rails, whilst trying to make do with a cross-head screwdriver when you really need a flat-head is asking for trouble. When it comes to paintbrushes, thereÔÇÖs no need to buy the most expensive on the market but very low-end budget brushes are best avoided, as they tend to leave bristles in those nice, freshly painted walls.
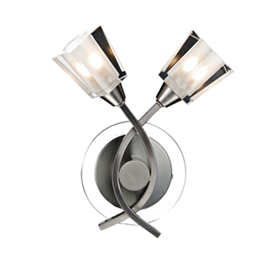 DONÔÇÖT ÔÇÿswitch offÔÇÖ interest after the painting and papering is done! Even the most expertly decorated room will be let down by poor lighting, so make sure this is included in your plans and your budget. The effort put into decorating a large room stylishly wonÔÇÖt be reflected with one measly central bulb, so think about installing a line of downlights or buying┬átable lamps to place in gloomy corners. And a small room can be made to look much bigger by bouncing light off the walls and ceiling with uplighters.
DO call in the professionals if a job is too big or tricky. DIY is all well and good for small jobs or if you know what youÔÇÖre doing, but tackling a job youÔÇÖre unsure of might prove a false economy ÔÇô especially if you have to call in the experts anyway to put right your disaster! Be particularly careful around electrics and plumbing and, if you are confident you can tackle a job yourself, make sure young children and pets are safely out of the way first.


 In response to all the questions put to the DIY Advice team about home and garden DIY, weÔÇÖve decided to launch a new ÔÇÿHow toÔǪÔÇÖ series. And what more of an ÔÇÿilluminatingÔÇÖ way to start than with a step-by-step guide to one of the most useful DIY skills you can have ÔÇô fitting a new light fixture to the ceiling!