How to… install a stair runner

stair-runner

The Dash & Albert Rug Co.


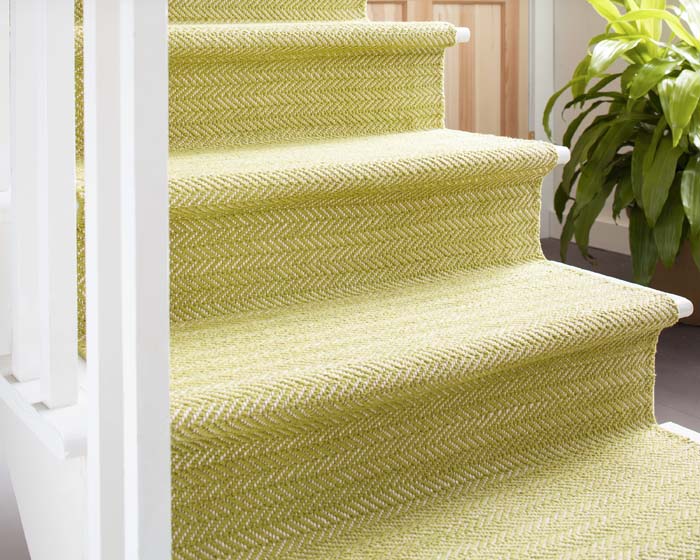
The kitchen might be the heart of the home but itÔÇÖs the hall that creates the first impression! If your entrance looks a little tired but you need to do your DIY on a budget, a stair runner can create the right welcome without the cost of carpeting the entire hall and landing. So hereÔÇÖs how to fit one!


What you need:

Air staple gun

Utility knife

Metre stick

Tape measure

Pencil

Stair rods

Stair pads


What you need to know:

The horizontal section of each stair – where you step – is called the TREAD.

The vertical section of each stair is called the RISER.


How to measure up:

To measure the length of the runner:

  • Multiply the number of treads by the depth of one tread
  • Multiply the number of risers by the depth of one riser
  • Add the two measurements together
  • Add three inches per stair
  • Add surplus to account for error

To measure the width, simply measure the width of one tread and subtract the amount of wood you would like on show either side (about four inches of stair either side is standard but it could be more on a wide staircase!).


Note that these instructions apply to straight stairs. Kite or winder (corner) stairs are a much trickier task and our advice would be to call in a professional carpet fitter.


  1. Sweep the stairs clean and remove any old nails or tacks.
  1. Lay a stair pad on each tread.
  1. Draw a straight line half an inch from the end of the runner and, using your metre stick and knife, cut the carpet to ensure a clean, straight edge.
  1. Measure the width of your stair tread with your tape measure and halve to find the centre point. Mark the centre of each tread with a pencil. Then measure the width of the stair runner and divide in half also, to find its centre.
  1. Place the runner on the top stair, leaving enough to cover the uppermost riser as well as the tread. Smooth out any air pockets and creases and, with the staple gun, tack the runner to the top of the riser, stapling every few inches along.
  1. Allow the runner to drop to the bottom of the staircase in line with each riser and tread. Loosely attach the stair rods by drilling holes in the stairs for the rod screws and loosely screwing in place.
  1. Staple the runner in place along the upper of each riser, just under the nose of the tread above. Remove the loosely screwed rod of that stair and tack the carpet again at the point where the riser meets the tread. Put the rod back in place, screwing it tightly into position.

8. At the bottom, trim any excess carpet and attach the runner along the bottom of the lowest riser.

Seven steps to a brilliant bathroom

diy-bathroom
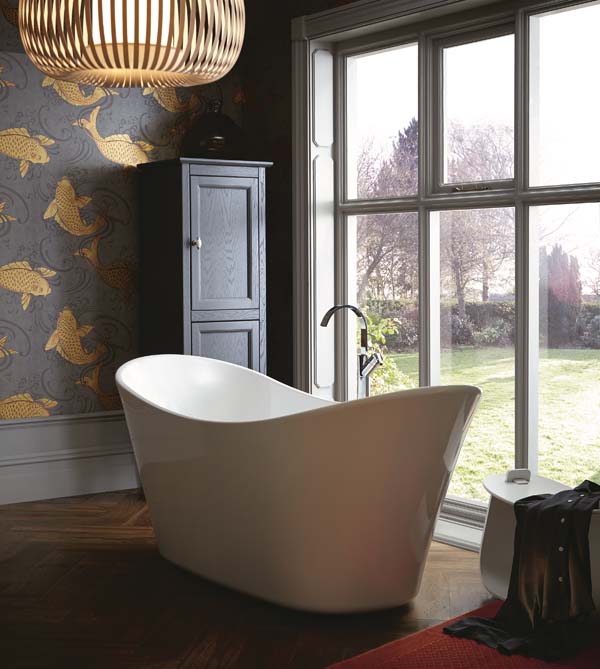
With news that nearly two thirds of us have not renovated our bathroom in the last five years, is it time your smallest room had a refit?
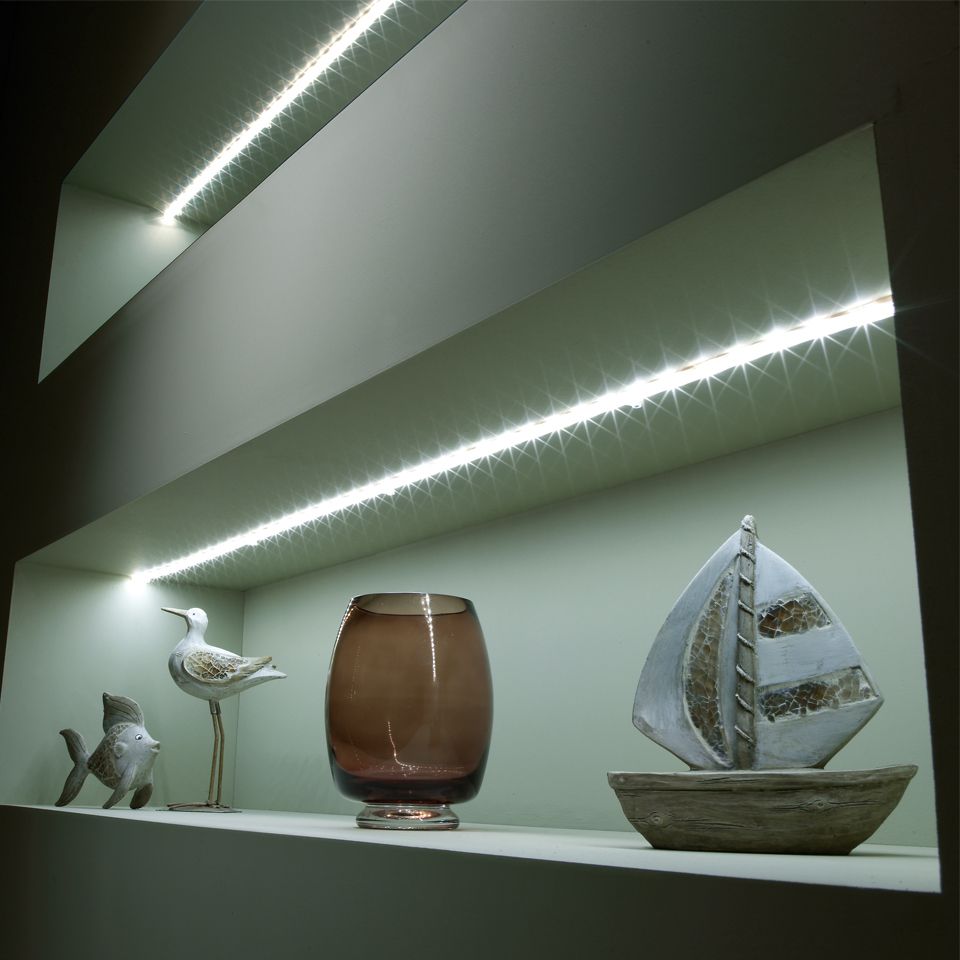
A recent survey from Shower Selector found that:

  • 31% of Brits have not decorated or renovated their bathroom in over five years
  • 18% are in the middle of a bathroom renovation
  • 16% last renovated their bathroom between two and five years ago
  • 11% of UK homeowners updated their bathroom between just six months and a year ago

So, with that in mind, here are our seven simple steps to the bathroom of your dreams:

  1. Work out your budget. A new bathroom neednÔÇÖt be expensive, but it depends on where you shop and how much of the work you are prepared to do yourself. Get quotes from online and in-store bathroom shops and donÔÇÖt forget to factor in delivery and labour costs. If youÔÇÖre not confident about plumbing but handy at decorating, you can hire contractors to install the bathroom then save money by doing the tiling and painting yourself.
  1. Plan ahead. Work out how long the job will take and how you are going to manage whilst itÔÇÖs being done – particularly if you donÔÇÖt have another loo! Check and double check measurements and factor in extra time (and budget) for unforeseen problems that might be uncovered along the way.
  1. Grand designs. Having a stylish bathroom is not all about buying the latest trends – in fact, often, just the opposite is true. When designing your refit, consider the age and style of your home, as well as your familyÔÇÖs size and lifestyle. Freestanding baths can look fantastically elegant in the right setting but would a fitted suite work better? Factor in existing wiring and plumbing and consider whether it can be moved or whether youÔÇÖll just to have to work with the current layout. Lastly, think about resale value in case you move. You might think those purple tiles and glitzy chandelier are the epitome of good taste but potential buyers might not agree!
  1. Walls and floors. Waterproof walls and floors are a must, and thereÔÇÖs a lot of choice on the market to suit all budgets. Marble, ceramic or granite tiles look stunning and are highly durable, but vinyl floor tiles can look just as effective at a much smaller cost. Remember that the flooring needs to be slip-resistant or, at the very least, buy a selection of high-quality, non-slip mats! Choose specific bathroom paint over standard versions as it features moisture and steam protection – and is even available in marble effect these days!
  1. bathroom-lightingRight lighting. Bathroom lighting needs to strike a fine balance between creating a calming atmosphere for a relaxing bath whilst providing the right light to allow you to shave or put on make up! Consider a feature ceiling light or downlights to create the right mood, with cabinet strip lights or a mirror light to carry out those close-ups. Due to the presence of water in the bathroom, lighting must meet a minimum IP rating, depending on its location, to reduce the risk of electric shock. HereÔÇÖs a handy guide to bathroom ÔÇÿzonesÔÇÖ and IP ratings applying to each.
  1. Ventilation. Good ventilation in a bathroom is essential to reduce condensation and eliminate smells. If the bathroom is in a new extension to your home, the GovernmentÔÇÖs planning portal says that it should have a mechanical extraction fan, but many homeowners also choose to install them in existing bathrooms. Some fans have timers, which are good for saving energy, whilst you can also buy high-powered inline fans with built-in LED lights.
  1. Accessorize. Once the refit is complete, all thatÔÇÖs left is to accessorize and, if your bathroom was done on a budget, this is where you can really glam it up! From shower curtains and bathmats to toothbrush caddies and loo roll holders, hereÔÇÖs your chance to ÔÇÿsplashÔÇÖ out on the small details!

20 things buyers hate about your home

home-buyer


Damp patches and odious odours are the most off-putting signs a potential buyer could find in your home, according to new research. Nevermind outdated artex or kitsch kitchens – signs of damp are feared by almost three quarters of house hunters!

A recent survey by Gocompare.com Mortgages showed that concerns about damp outweighed worries of poky rooms, a lack of parking and botched DIY. More than 70% of Brits said damp patches on walls or ceilings would stop them buying a property, whilst signs of poor maintenance – such as rotten windows – came a close second.

But the good news is that help is at hand for would-be vendors, and that they can increase their chances of a sale by following a few simple tips involving quick repairs and decluttering.

According to the 2,000 adults quizzed, the top 20 property turn-offs are:

  1. Damp patches and/or stains on the walls or ceilings – 71%
  2. A poor state of repair, eg: rotten windows – 65%
  3. Unpleasant smells, such as pets, damp and cigarettes – 61%
  4. A lack of parking – 59%
  5. No garden – 57%
  6. Unfinished building work – 55%
  7. Poor natural light and/or dark rooms – 50%
  8. Outdated electrics – 50%
  9. Small, poky rooms – 48%
  10. Inefficient boiler or central heating system – 45%
  11. Poor DIY – 43%
  12. A small kitchen – 40%
  13. General untidiness and/or dirtiness – 28%
  14. Wooden windows – 27%
  15. Stone cladding, render or pebbledash – 27%
  16. An outdated kitchen – 25%
  17. An outdated bathroom – 25%
  18. An overgrown garden – 19%
  19. Artex or textured ceilings – 18%
  20. Cluttered rooms – 16%
home-buying

Samsung Camera Pictures

Mortgages spokesman Matt Sanders says: ÔÇ£Moving home is a big undertaking for sellers who want to attract the best price for their property and buyers who, in the main, want well maintained properties. Our survey suggests that many homebuyers want a home thatÔÇÖs ready to move into and are put off by properties requiring repairs or maintenance work.

ÔÇ£Damp is a particular area of concern; a musty smell, black mould, stained ceilings or crumbling plasterwork are all warning signs of problems which, depending on the cause, can be costly to remedy. Interestingly, while many buyers are put off by poor maintenance and bad DIY, only a quarter would shy away from properties which have outdated kitchens or bathrooms ÔÇô two of the most expensive rooms in a home to update.ÔÇØ

Matt suggests these top tips for easy and inexpensive ways to get your home ready to sell:

Spring clean your home from top to bottom, inside and out. Remember to air the rooms and clean windows to help increase natural light. Banish nasty smells by having the carpets and upholstery professionally cleaned and, if you have a cat, be sure to clean the litter tray before a viewing.

De-clutter to make your home appear more spacious and to make it easier for potential buyers to see past your belongings. Pack away rarely used or out-of-season items and store toys in baskets or boxes.

Carry out minor repairs to dripping taps, holes or dents in walls or woodwork or gaps in fences and gates. Complete any outstanding DIY jobs.

Tidy the garden by mowing the lawn, weeding flowerbeds, trimming hedges and removing any litter. A well-kept garden will increase your propertyÔÇÖs kerb appeal and invite buyers inside.

Repaint tired or worn d├®cor to give rooms a lift and, depending on the colour scheme, help make it look lighter or larger.